In this blog, we walk you through migrating from MuleSoft’s Mule 3 to Mule 4 using MuleSoft Migration Assistant (MMA) in a few simple steps.
Since MuleSoft ended support of Mule 3, every organization using it must now shift to Mule 4 to access all of its new features. In this blog, we will walk you through that process.
When migrating application programming interfaces (APIs) that are already running on production, it’s important to continue providing the same functionality and results. That way, the end user doesn’t need to make any changes on their end. Our team performed the migration in such a way that it did not affect APIs in production, and our end users easily started using the migrated Mule 4 APIs when we finished the project.
Taking Stock Before Getting Started
It’s also important to make sure you and your team are prepared before the migration so you don’t lose any important data or have a misstep halfway through the process. Here are a few points to consider while planning for your migration:
- RESTful API Modeling Language (RAML) – Do you require any refactoring of RAML?
- Custom Implementations – Do you have custom Java implementations for file handling, parsing, reading messages from queues, backend applications, and so on? Do you have Groovy Scripts? Do you use any customer components?
- Naming Conventions – Do you have naming standards you need to follow?
- Logging and Exception Handling – Do you have logging standards? Or, do you need to use any global exception handling?
- Reusability – Do you have any scope of reusability?
- General Optimization – Have you considered general conditions, hardcoding or custom implementations?
After you take a moment to walk through these considerations and feel confident in your ability to move forward successfully, it’s time to decide how to approach your Mule 3 to Mule 4 migration.
Essentially, you have two options:
- Write all of the code again, or
- Use the MuleSoft Migration Assistant (MMA).
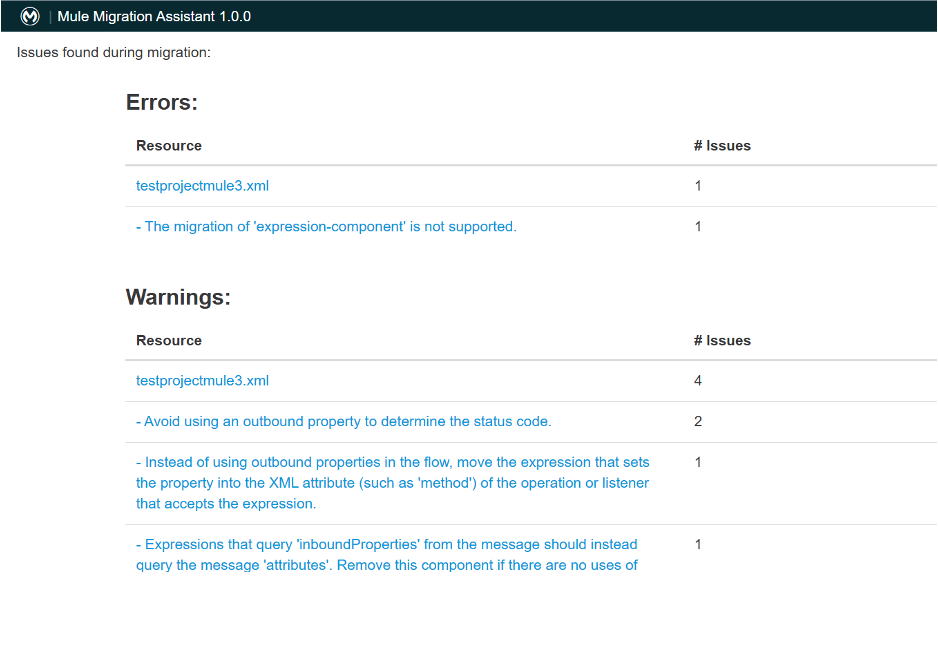
Our team used MMA to migrate APIs quickly from Mule 3 to Mule 4. Though the MMA tool does not migrate everything, it creates a structure for the Mule 4 project that requires fewer migrations and makes the task significantly easier. It also generates an error report that shows what you will need to shift over manually.
Steps for Mule 3 to Mule 4 Migration Using MMA
- Import the Mule 3 application into Anypoint Studio 6.x. Then, import the Mule3 API in Anypoint Studio.
- Download MMA .
- Run the migration using MMA, then run the following command:
java -jar mule-migration-assistant-runner-1.0.0.jar -muleVersion 4.2.2 -parentDomainBasePath <<Domain project path>> -projectBasePath <<Mule 3 project path>> -destinationProjectBasePath <<Mule project path>>
MMA will create a Mule 4 project and generate a report mentioning errors and warnings.
- Import the Mule 4 project to Anypoint Studio 7.x. The MMA creates the Mule 4 project after running the command in Anypoint Studio.
- Fix any errors and warnings in the project so it will run successfully. You must resolve errors before running the application. Warnings will let you run the application, but you must replace these with a Mule 4 component before deployment.
Conclusion
MuleSoft has officially ended support for Mule 3, so it is important to migrate your APIs to Mule 4 to make sure you are getting all available functionalities. Mule 4 provides connectors that help to add functionality to APIs and reduce the need to write scripts within APIs. It also helps to leverage the new features in the API that Mule 4 provides, as it improves the performance of your API.


