Learn how you can apply sensitivity labels to documents and configure them in Microsoft 365 with Microsoft Purview Information Protection, formerly known as Azure Information Protection.
Organizations are inundated with data, ranging from emails and responses to confidential documents and data collected and stored with software-as-a-service providers. This data is crucial for enhancing efficiency and effectiveness, so sharing data with users, business partners, and suppliers is a necessary function for companies today.
However, sharing massive quantities of information across cloud services comes with its own set of challenges, from potential security threats to privacy compliance risks. How can you ensure that important data is protected without needing to protect everything?
The sensitivity of data varies significantly from public information to highly confidential trade secrets. To ensure proper protection, organizations need to identify and classify data while defining standards and policies to handle each type of data properly.
What Is Data Classification?
Data classification is the process an organization follows to develop an understanding of its information assets, categorize those assets to safeguard information, and comply with its information security policies, laws, regulations, and compliance obligations.
You can do this by applying sensitivity labels to documents either manually or automatically based on predefined policies.
A typical data classification policy might define information at four levels:
- Restricted: Data that is considered most critical to the organization. Disclosure of this data could violate regulations or have a severe regulatory impact.
- Confidential: Highly sensitive corporate and customer data that, if disclosed, could put your organization at financial risk or at risk of losing customers or disrupting operations.
- Official Use: Internal data that is not meant for public disclosure. If the data is compromised, it would have minimal impact, but this data does not impact profitability or continuing operations of the business.
- Public: Data that requires no special protection and may be freely disclosed to the public.
Benefits of Classifying Your Data
Consistent use of data classification will facilitate more efficient business activities and lower the costs of ensuring adequate information security. By classifying data, your organization can prepare to identify the risk and impact of an incident based on what type of data is involved.
- Compliance – Classifying data, adding labels, and enforcing policies helps your organization meet legal compliance and regulatory requirements.
- Usage Rights – By understanding the sensitivity of the data, you can begin to understand who should or shouldn’t have access to it both inside and outside your organization.
- Awareness – Data classification helps to ensure employees are more aware of the type of information they are dealing with and its value, as well as their obligations in protecting it to prevent data loss or compromise intellectual property.
- End-User Empowerment – Data classification brings security to the forefront of your organization by empowering its users. You can avoid many data leaks if a data classification solution is in place. Adding visual labels to headers and footers helps to raise end-user awareness, assisting them in becoming more security-focused and avoiding sharing sensitive content on USB drives, via email, or cloud services like Box or Dropbox.
Getting Started Using Microsoft Purview Information Protection
Getting started with data classification requires understanding your organization’s data compliance and security needs. When you are ready to start classifying your data, keep these in mind:
- Keep the process of classifying data simple for both users and data custodians.
- Don’t try to classify everything immediately.
- Work with data owners to focus first on the most business-critical, highly sensitive critical assets and systems.
A tool can help. Most recently, I have been working with Microsoft Purview Information Protection (MIP) to classify and protect data in Microsoft 365. MIP provides data discovery, classification, labeling, and protection for documents, emails, meetings, Teams, Microsoft 365 Groups, and SharePoint sites in your organization.
Azure Rights Management service (Azure RMS) is the protection technology for Azure Information Protection and for Microsoft 365 services that use this cloud-based Rights Management protection.
What Are Labels in Data Classification?
In MIP, a classification label is used to identify data based on its level of sensitivity and the impact on your business. Most common sensitivity levels are categorized as restricted, confidential, official use, and public.
MIP can apply labels to (classify) documents and emails. The current supported file types for classification according to Microsoft are listed below. Visit this page for the latest information on supported file types:
- Adobe Portable Document Format: .pdf
- Microsoft Project: .mpp, .mpt
- Microsoft Publisher: .pub
- Microsoft XPS: .xps .oxps
- Images: .jpg, .jpe, .jpeg, .jif, .jfif, .jfi.png, .tif, .tiff
- Autodesk Design Review 2013: .dwfx
- Adobe Photoshop: .psd
- Digital Negative: .dng
- Microsoft Office: 97-2003 file formats and Office Open XML formats for Word, Excel, and PowerPoint, including: .doc, .docm, .docx, .dot, .dotm, .dotx, .potm, .potx, .pps, .ppsm, .ppsx, .ppt, .pptm, .pptx, .vdw, .vsd, .vsdm, .vsdx, .vss, .vssm, .vst, .vstm, .vssx, .vstx, .xls, .xlsb, .xlt, .xlsm, .xlsx, .xltm, .xltx
Let’s look at how users and administrators can use Microsoft Purview Information Protection for data classification.
Classifying Your Documents
Users can assign predefined or customized labels manually, or you can configure MIP to automatically recommend or apply a default label, given that it’s an AI-based platform.
This image shows the default labels from MIP that users can apply to their documents from within Microsoft Word.
I added a few customized sub-labels to the existing default ones. You can modify the preexisting ones as well.
You can even configure the labels to display in different languages based on your Microsoft client. In the image below, I configured my labels to display in Spanish.
How Do You Publish Labels in MIP?
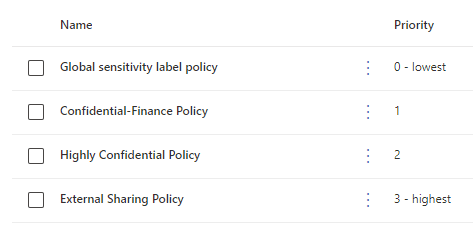
From the Microsoft Purview Information Protection Portal, you can configure how labels are published to your users. You can scope or target labels for all or specific users and groups. These are the label policies I published.
Now that you have seen how users can interact with sensitivity labels and how you can target label policies, I’ll introduce some additional features you can use to enhance and protect your data in Microsoft 365.
Protect Labeled Items
You can use MIP labels for more than classification. They can further protect your data by applying any or all of these additional features to ensure confidentiality or restricted access:
- Visual markings (header, footer watermark). Watermarks are applied to Word, Excel, and PowerPoint only.
- Encryption and Permissions settings.
- Conditions for Automatic Classification. You can define conditions that could detect data patterns for automatic classification. Custom conditions can be words, phrases, patterns, and even regular expressions.
Apply Visual Markings
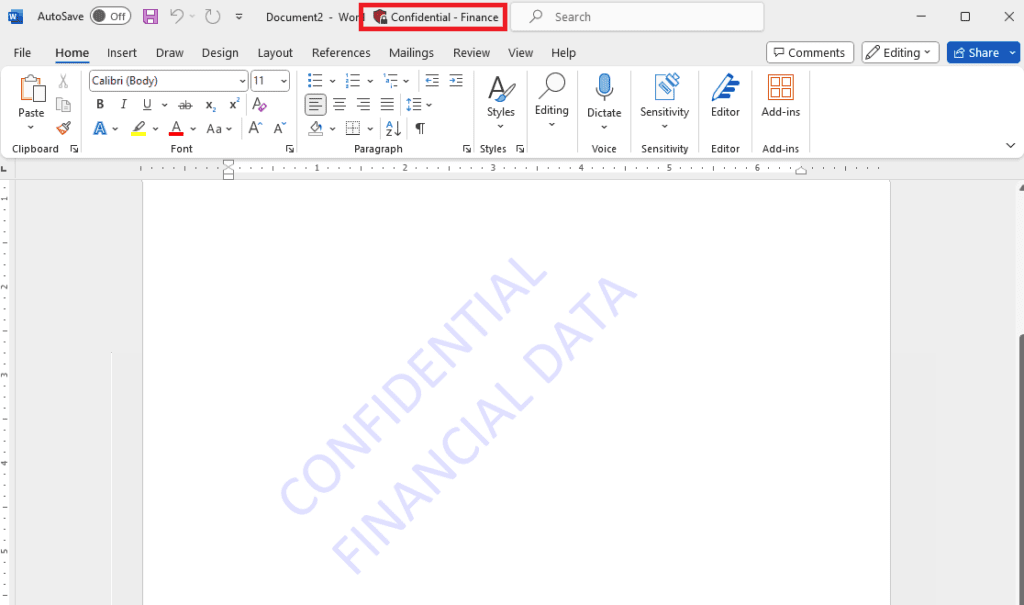
In this example, I created a label called “Confidential Finance” and added “Confidential Financial Data” as its watermark. After the label is saved and published, when the user selects the above label, the document displays as shown in the following image:

A new document with “Confidential – Finance” label and “Confidential Financial Data” watermarked across the document diagonally.
Note that visual markings do not appear in documents when the label is applied using File Explorer and a right-click action, nor when a document is classified by using PowerShell.
Enforce Encryption and Permissions
Azure RMS is the protection technology used by Microsoft Purview Information Protection. Azure RMS allows you to set permissions and automatically protects documents and emails.
You can protect your data within MIP by encrypting and assigning permissions to restrict access to content.
You can select one of the following encryption settings:
- Assign permissions now – allows the administrator to preconfigure which users get which permissions to content that has the label applied.
- Let users assign permissions – allows users in your organization the flexibility to assign appropriate permissions when they apply the label.
When you select Assign permissions now, you can choose actions a user/group can perform from a predefined permissions level or custom permissions.
Automatic Labeling
You can configure Microsoft Information Protection (MIP) to automatically apply sensitivity labels to email messages or files with one of the following methods:
- Client-side labeling – this method supports recommending a label to users, as well as automatically applying a label.
- Service-side labeling – this method applies a label to data at rest or content already saved in SharePoint or OneDrive and data in transit (email that is sent or received by Exchange). Note that it does not include emails at rest.
In this example, MIP detects sensitive information in the document and recommends a label to the user.
Conclusion
These are just a few examples of how you can use MIP and Azure RMS features to classify and protect your documents and email.
Securing data is a growing challenge, but incremental steps are keys to an organized and classified data model. Data classification and protection provide a clear picture of the data within your organization’s control, an understanding of where data is stored, how it’s most easily accessed, and how data is best protected from potential security risks.
Once you know that, everything from regulatory compliance to the user experience will be stronger throughout your organization.


