Our regular series of #TechTuesday Tips aims to help you resolve your technical issues.
In our latest installment of #TechTuesday Tips, learn how to integrate an Angular2 application, running on ASP.NET Core, with an OpenID Connect implementation.
Also included in this post: IdentityServer4 is built using OpenID Connect; oidc-client, which is a JS module and a component that allows our Angular2 application to interact with an OpenID Connect implementation. Oidc-client uses sessionStorage to store Access and Refresh tokens.
Because it uses sessionStorage in nodejs, it sometimes gives you compilation errors. We’ll explain how to resolve this issue as well.
#1 Getting the Template
The first step is to create a SPA (Single Page Application) .NET Core project using Visual Studio 2015 Community Edition. Make sure you have the latest VS update and download the proper template, as per Steve Sanderson’s blog).
Another easy approach is to simply clone the following GitHub project:
This template is based off the ASP.NET Core template for Visual Studio created by Mads Kristensen. It contains the necessary settings for Angular2 and WebPack, including Hot Module Replacement (HMR), which is extremely useful when developing an application. HMR will detect any client-side modification and recompile your JS application, immediately reflecting all the updates on your browser without the need to refresh it.
#2 Restoring nuget Packages
Once you have successfully cloned the application, or created one in Visual Studio, let’s proceed to restore the .NET references by running the following command in Visual Studio Code terminal (to access the terminal, click under View then select Integrated Terminal or press CTRL + ` key combination) .
Once in the terminal, execute the following command:
dotnet restore
#3 Attempting to Run the Application
To run the application in Visual Studio Code, you have two options:
1. Execute dotnet run command in VS Code terminal
OR
2. Debug the application in VS Code (click on the bug button from the left menu and click on the play green button that is on top)
Let’s execute either of the options and check the results. Did you get it working? … Most likely no, and the reason is because there are a few additional steps.
#4 Restoring NPM Packages
If you are familiar with Angular or any other JS application, you’ll notice that packages are most of the time resolved or downloaded by NPM (Node Package Manager). The way it works is simple – NPM will look into a file called package.json to resolve all the module references.
Now, let’s run the following command:
npm install
Note: You might want to run the install command using elevated rights. There are some packages that won’t get properly installed if the command is not executed with elevated rights.
For Linux or OSX, run:
sudo npm install
For Windows, run:
install command (npm install) by executing cmd as an Administrator
After you have successfully installed all the packages, you will notice there is a new folder called node_modules, which contains all the packages referenced in package.json.

Fig 1. node_modules folder created
Now, proceed to close the folder (or exit Visual Studio Code) and open it again. This way it will stop complaining about missing references (even if you already added them).
#5 Debugging the Application
Now that we have all the packages (nuget and NPM) restored, we should be all set to start debugging our application in Visual Studio Code.
Let’s proceed to debug our application (click on the bug button, then click on the green play button). Is it still complaining and throwing an exception?
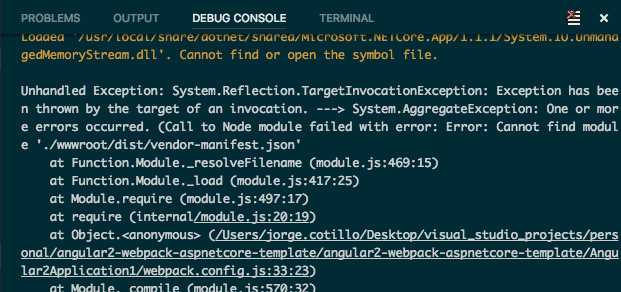
Yes, that’s because if you look closely at the stack trace, you will find a missing module exception: vendor-manifest.json (you might need to keep clicking on the play button until the entire stack trace is fully displayed).

Fig 2. Missing vendor-manifest.json file
If you know a little bit about Webpack, you’ll realize that the error is related to Webpack not being able to find the vendor-manifest.json file. But how does this file get created? Don’t panic, I went through the same feeling and I’ll explain what you need to do.
If you open up your csproj file, look toward the end of the file where you will find a target called PrepublishScript. This target has two node commands that are related to Webpack. To run these commands, you have two options:
- Run the following commands (one at a time) in either terminal or cmd (recommendation is to run the command with elevated rights — sudo or cmd as an Administrator):

- Run the following command: dotnet publish — this command will execute PrepublishScript target
Now, let’s look at your project structure and you’ll see that under wwwroot — dist folder, there are several new files, including the missing vendor-manifest.json.
If you open ClientApp — dist folder, you’ll notice that a new file was created. These are the files (called “emitted” files) that Webpack created after running node webpack.js commands.

Fig 4. Files emitted by Webpack
What is left at this point is to finally debug the application using Visual Studio Code.
Let’s click on the bug button from the left menu and click on the green play button on top to start the debugging session. If you experience access issues when debugging the application, refer to File Access Error.
#5.1 File Access error
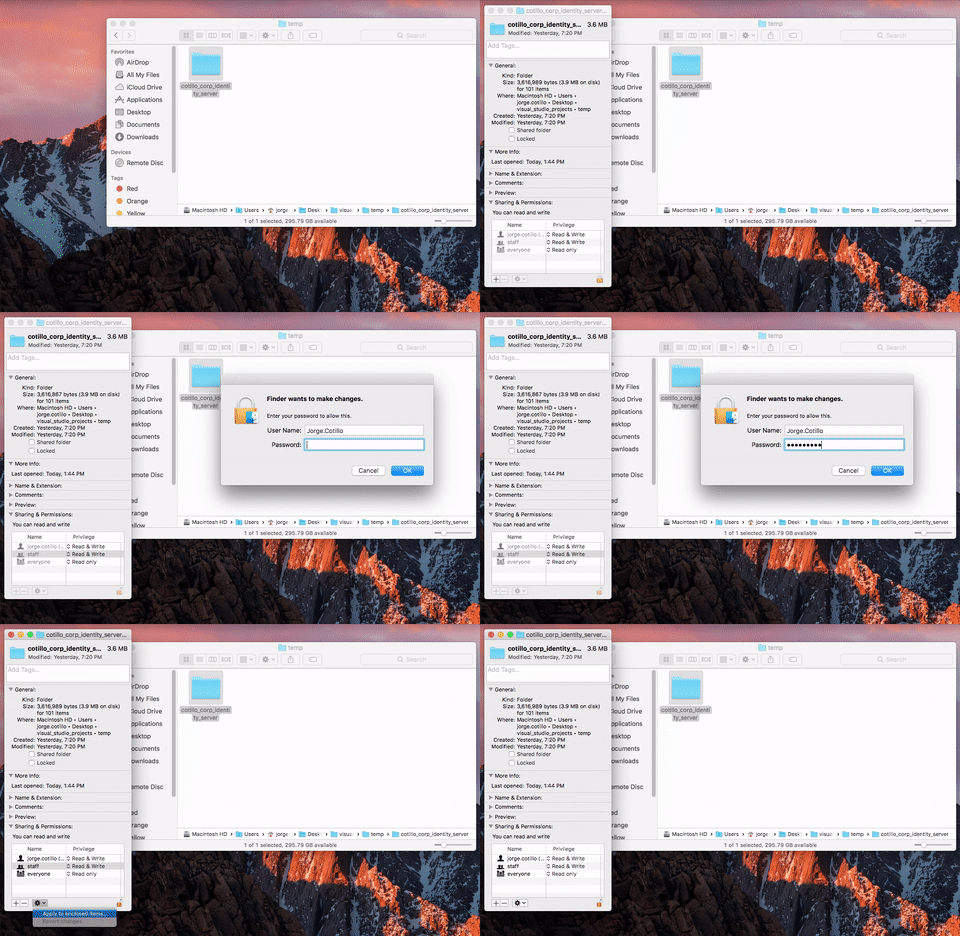
If you followed all the steps but get a file access error when you want to debug your application, then you will have to grant read/write access to your folders – or run Visual Studio as an Administrator.
If you are using a Mac:
- Right click on your project folder
- Click on Get Info
- Under Sharing & Permissions for Staff select Read & Write
- Click on the lock icon, enter the user and password of an admin account
- Click on the gear icon at the bottom and click on Apply to enclosed items
Now debug your application and voila! Visual Studio Code should now be able to debug your application.

Fig 5. Grant read & right access
#6 Validating Hot Module Replacement Configuration
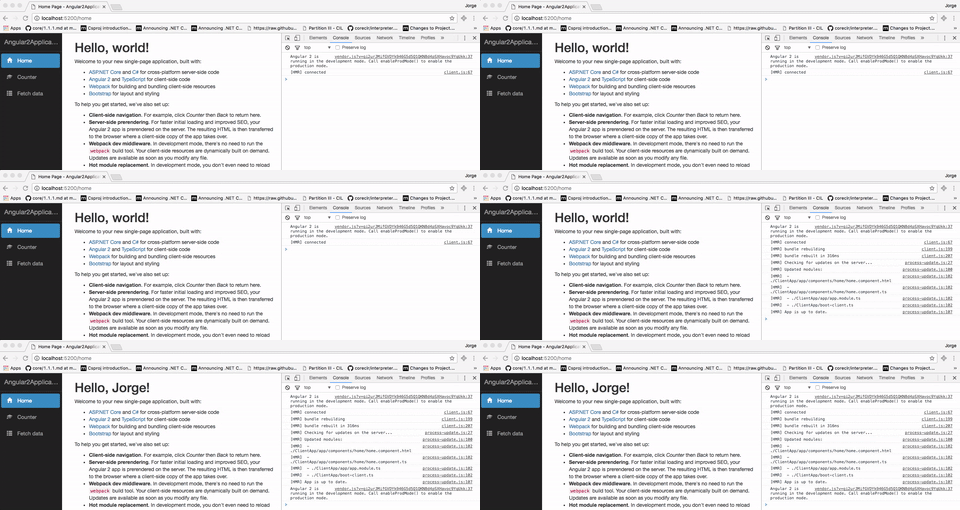
If Chrome is your browser of choice, press F12 (in Windows) or ALT + Command + I (in Mac) and look at the Console tab. You will see that it says: [HMR] connected.
Note: If you decide to run your application by executing dotnet run, you will notice that HMR is not be enabled. This is because you are not passing “Development” as the environment variable. If you want to run the application in Development mode, execute the following command:
dotnet run — environment=”Development”
#7 Testing Hot Module Replacement
To make sure that HMR is properly running , you will need to make a quick update to the home page.
- Expand ClientApp — app — home folder
- Open home.component.html file
- Modify the title (H1), add your name and save the file
Look at your browser’s console log. You will see that WebPack just updated your existing bundle.

Fig 6. Webpack HMR in action
#8 Integrating with IdentityServer4
If you don’t have an IdentityServer4 host running, please refer to this post for directions on how to run IdentityServer4 in ASP.NET Core and configure a JS Client.
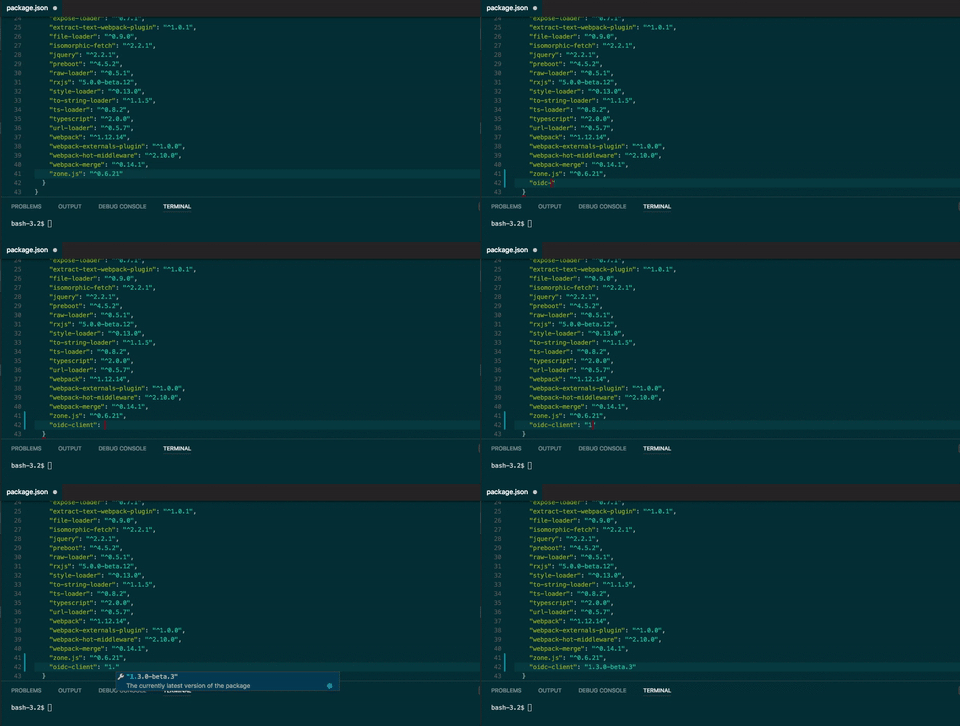
Now that we have a working Angular2 project in ASP .NET Core, what we need to do is to add a new package in package.json file. We’ll take advantage of Visual Studio Code intellisense. Proceed to open up package.json, and type the following after the last package:
“oidc-client”: “1.3.0-beta.3”
If you only type “oidc-client” and you hover over it, Visual Studio Code will tell you which is the latest version.

Fig 7. Adding oidc-client package
Now, proceed to install the new package by running the following command:
npm install
Remember to run the command with elevated rights (run cmd as an administrator or by adding sudo to the command).
After running the command, you will see that oidc-client was successfully installed (you can validate that the package has been successfully installed by expanding node_modules folder and locating oidc-client).
#9 Configuring oidc-client
After we have the package installed, what we need to do next is to proceed to configure our Angular2 application by following these steps. The following code is an adoption of Justin Murphy’s repo):
- Create a new folder called shared (under ClientApp — app — components)
- Create a folder called services inside shared folder
- Create a new component called auth.service.ts
- The contents of the file can be found in this github repo
Recommendation: Clone the repo as it has all the necessary code for your Angular2 application to interact with OpenID Connect . This repo was built on top of the previous Angular2 + ASP.NET Core template mentioned above.
This repo contains all the necessary code to configure your Angular2 application to work with IdentityServer4 by using oidc-client component. Additional code in this repo shows how to secure your components by verifying if the user is logged in or not.
If not, then the user will get redirected to the login screen, development and production settings included. And lastly, it contains HTTP call wrappers .
All this additional code is good but there is one missing piece, an if condition.
#10 Making oidc-client Work with Angular2
This was the step that took me the longest to implement, simply because I did not find a single source that could serve as guidance.
As mentioned before, I found a pretty good and solid example – thanks to Justin Murphy – but there was a missing piece related to a sessionStorage error that I was constantly facing.
Oidc-client uses sessionStorage to store, at the client side, Access and Refresh tokens (OAuth2 tokens). Since the JS code gets compiled on the server side by nodejs, a sessionStorage (which belongs to window object, does not exist on nodejs ) workaround is to simply add an if condition like the following:

Fig 8. Missing condition
But, where do you add this statement? Well, if you have already cloned my last github repo, then there are two places that need this if condition:
- In Auth.Service.ts, locate the constructor and just before creating an instance of UserManager, add the if condition
- In Auth.Service.ts, locate endSigninMainWindow and enclose the entire signinRedirectCallback with the if condition
Now you have a fully working template that works in Visual Studio Code, Visual Studio Preview and Visual Studio 2015+.
