
Build a site map in SharePoint Online using the Content Search Web Part and Sites Web Part to organize and display your organization’s webpages effectively.
As organizations migrate their intranet from the on-premises version of SharePoint to SharePoint Online, they are using its mobile-friendly design to create webpages and sites that quickly and aesthetically display their videos, images, graphs, and more. To organize the SharePoint Online experience, it may be helpful to create a site map, a visual representation of where to find specific sites within your organization’s SharePoint environment.
Creating a site map for your SharePoint will tailor its display to optimize the user experience, allowing them to easily navigate your organization’s digital environment, collaborate with team members, and manage projects of different scopes. Additionally, with its robust permission and access features, a site map can assist governance efforts and enhance data security within your organization.
The on-premises version of SharePoint had a similar capability to a site map called the publishing feature, which displayed a table of contents of sites within the organization’s SharePoint and showed users which document libraries they had access to. Two different web parts bring a similar capability to SharePoint Online, namely the Content Search Web Part, which presents results for specific search queries, and the Sites Web Part, which organizes a user’s most frequently used sites, including a link to each and a quick rundown of its latest activity.
A Quick Rundown of SharePoint Terminology
The following SharePoint terms will enhance your understanding of the digital environment that we will be mapping.
1. Web Parts
The building blocks of SharePoint, web parts are modules you can add to a webpage to display content, like images and documents, or perform specific functions. In this article, we’re looking at web parts that display content, specifically lists of sites within your organization’s SharePoint.
2. Modern Pages
Made up of various web parts, modern pages are customizable webpages designed to be easily used on desktops and mobile devices alike. Multiple modern pages make up a site – a set of modern pages grouped by content, purpose or structure.
3. Site Collections
Site collections are containers that group related sites based on similar content or administrative controls. Each site collection has its own permissions, settings and features customized to your desired standards.
4. Site Maps
A site map is a visual display of the structure and layout of various sites within a site collection. As its name suggests, site maps help users navigate through the different webpages, sites and subsites in their SharePoint environment.
5. Classic vs. Modern SharePoint
Classic SharePoint is the traditional on-premises SharePoint interface, but it’s also applicable in SharePoint Online. By contrast, Modern SharePoint, optimized for mobile devices, is exclusively for online use. (It’s important to note that classic web parts are only compatible with classic web pages, just as modern web parts are only compatible with modern web pages.)
Once you understand the structure of SharePoint Online, you can better tailor its features to your specific needs. Next, we will show you two ways to create a site map in SharePoint Online, each using a different web part.
Our Business Case Using SharePoint Online
In this scenario, we use a site collection that we migrated from SharePoint On-Premises containing several subsites (I know what you’re thinking — how dare he use that terrible “subsite” word! Let’s save that discussion for another day).
In our legacy on-premises SharePoint environment, the site collection’s home page displayed all subsites within one web part. To replicate that functionality, we can use SharePoint Online’s out-of-the-box web parts to create a separate site collection to host the home page. The list of sites should only display sites to which a user has existing permissions.
In this example, we use two websites:
Site 1 – https://ourtenant.sharepoint.com/sites/ClassicSiteExample
We migrated this site from SharePoint On-Premises to SharePoint Online. It contains subsites that use unique permissions based on departments.
Site 2 – https://ourtenant.sharepoint.com/sites/Landing
This site will be the landing page that displays a list of sites from Site 1 within a web part
First, we will create a site map using the Content Search Web Part, then the Sites web part.
Creating a Site Map with the Content Search Web Part
The Content Search Web Part (CSWP) allows you to customize the way you display search results. Each CSWP displays results for specific search queries, and you can use templates to customize how these results appear on your webpage as your site map.
To access the Content Search Web Part, click on SharePoint Server Enterprise Site Collection features. Once you enable that feature for the site collection, the web part will be available in the standard web part menus within the Content Rollup section.
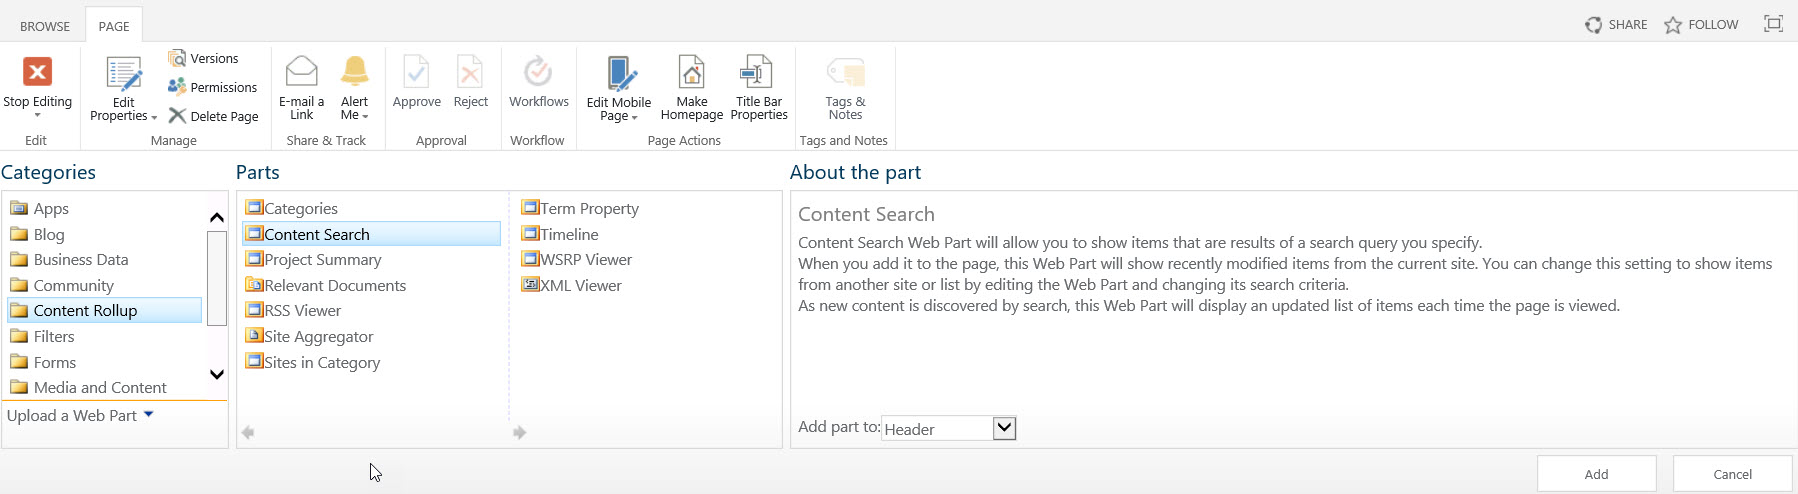
Having added the web part to our classic web part page, you can now configure its various settings as desired, including what the search query is, how many results the web part will display, and how to layout the results.
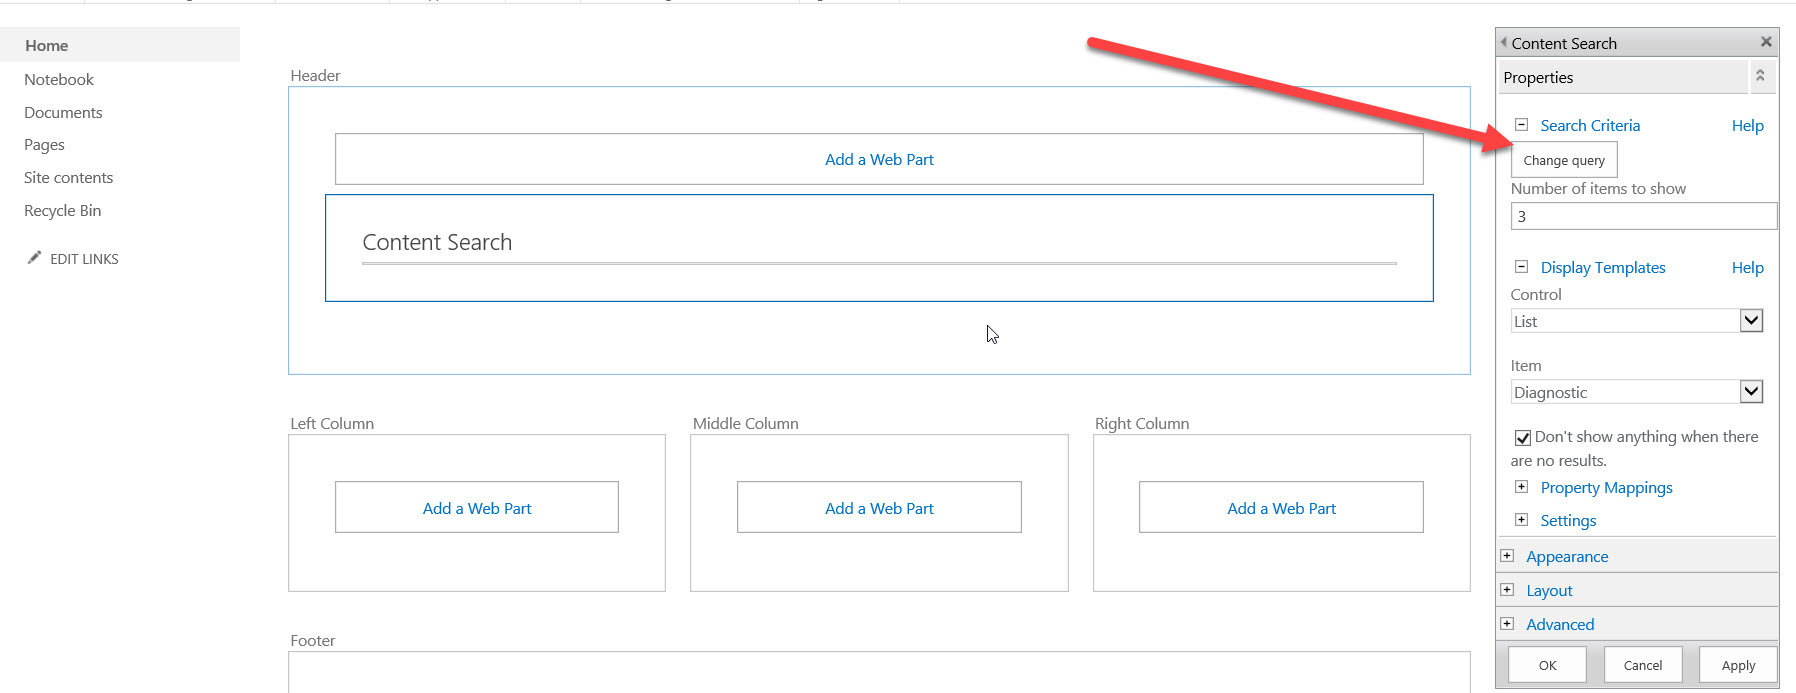
At first glance, this settings page looks complicated, but don’t worry — we only configure a few settings to display what we need.
Beginning with the Basics tab, change Select a Query to Items matching a content type and Restrict by app to Don’t restrict results by app. By changing these settings, we can display results from another site collection that match the content type we prefer, namely sites.

Next, we need to define where we would like to gather our results from. In our scenario, that is, any subsites contained within Site 1. To scope the results to Site 1, place the following query in the Add additional filters box (and make sure to adjust the URL to your desired destination):
contentclass:STS_Web Path:https://ourtenant.sharepoint.com/sites/ClassicSiteExample
To ensure you get your desired results, click out of the Add additional filters box, and the preview pane to the right will refresh based on the query you just entered.
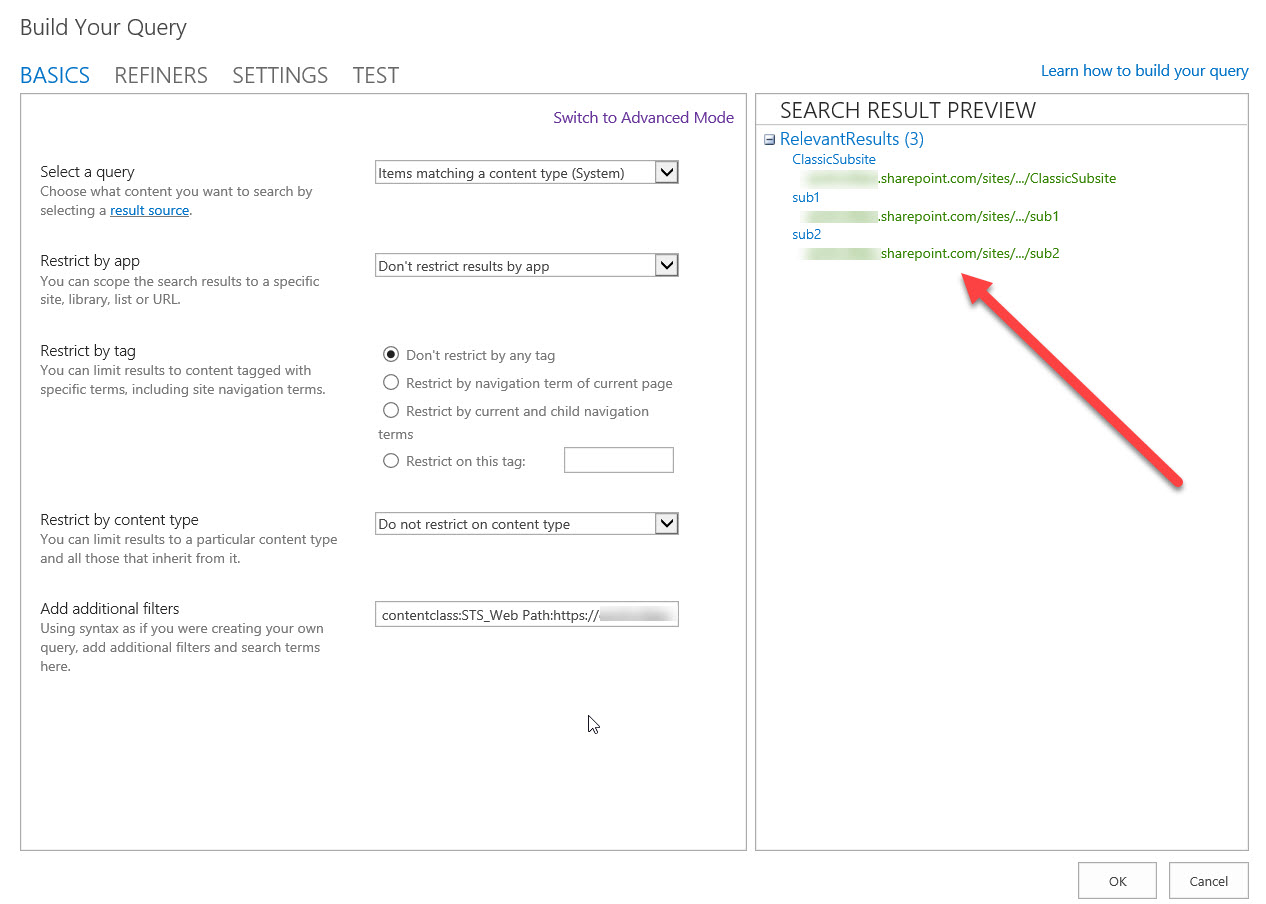
In the image above, you can see the results display all subsites from Site 1.
Click OK to save the query and close the query builder. Finally, save the web part settings using the Apply button and publish the page.
The finished result is displayed below!

Creating a Site Map with the Sites Web Part
Before we show you how to add the Sites Web Part, we have to introduce you to one more SharePoint term: a hub site.
Similar to a site collection, a hub site organizes sites within your SharePoint based on customizable criteria, such as projects or departments. But while a site collection groups a collection of sites (literally subsites) under its “umbrella,” a hub site operates without a hierarchy, granting you the flexibility to designate associations among sites and detach their connections if necessary.
Within this context, the Sites Web Part automatically showcases sites within a hub site, creating a site map of your SharePoint Online environment.
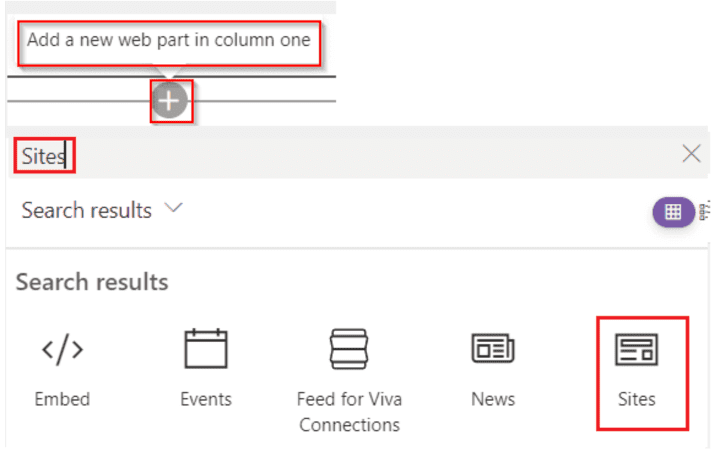
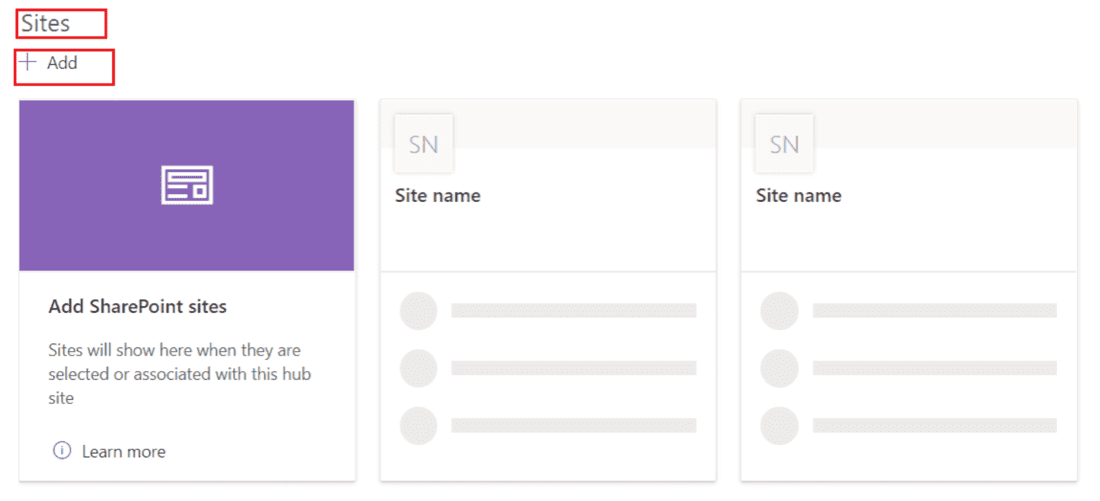
To add the Sites Web Part, go to the webpage where you would like to add it and click Edit at the top right of the page. Then, click the grey plus sign. You should now be able to browse the web part toolbox and select the Sites web part.
https://www.enjoysharepoint.com/sharepoint-online-sites-web-part/
To select the sites you would like the web part to show, click Edit web part in the top left corner. This will open the Sites toolbox.
https://www.enjoysharepoint.com/sharepoint-online-sites-web-part/
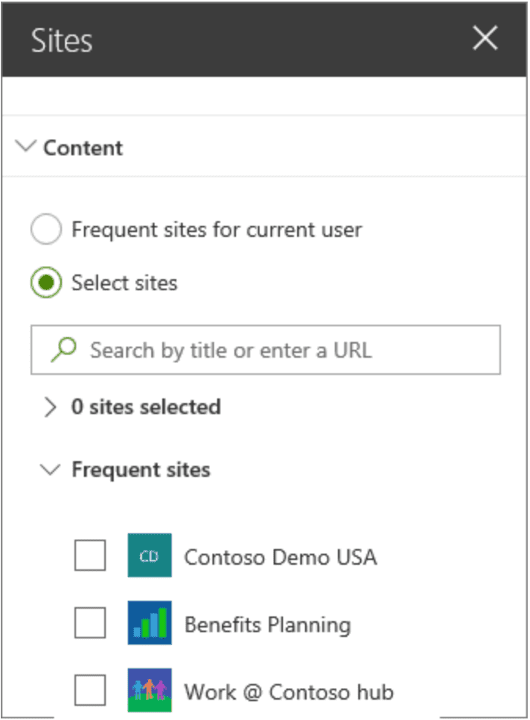
To manually choose sites for this web part, click Select sites and search for the sites you want to add. If you want to add multiple sites, you can click Sites associated with this hub, Frequent sites, or Recent sites. Click the checkboxes next to each site you want to display within this web part.
https://support.microsoft.com
Or, if you would rather automatically display sites, click Frequent sites for current user. This will display the same sites as those that are already on the user’s SharePoint homepage.
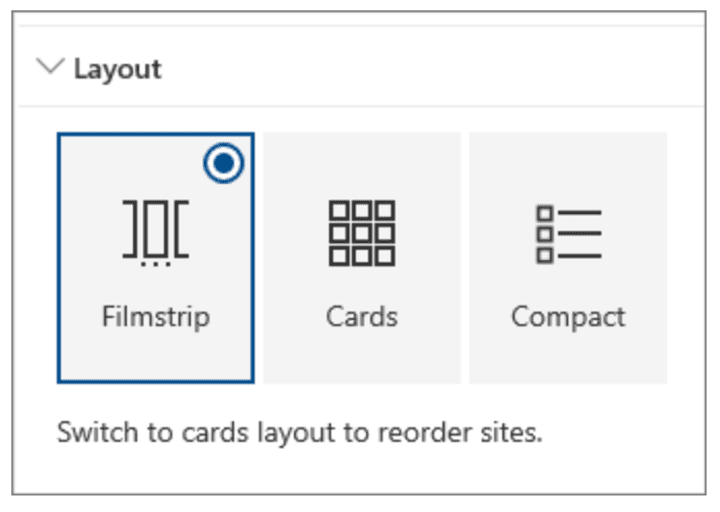
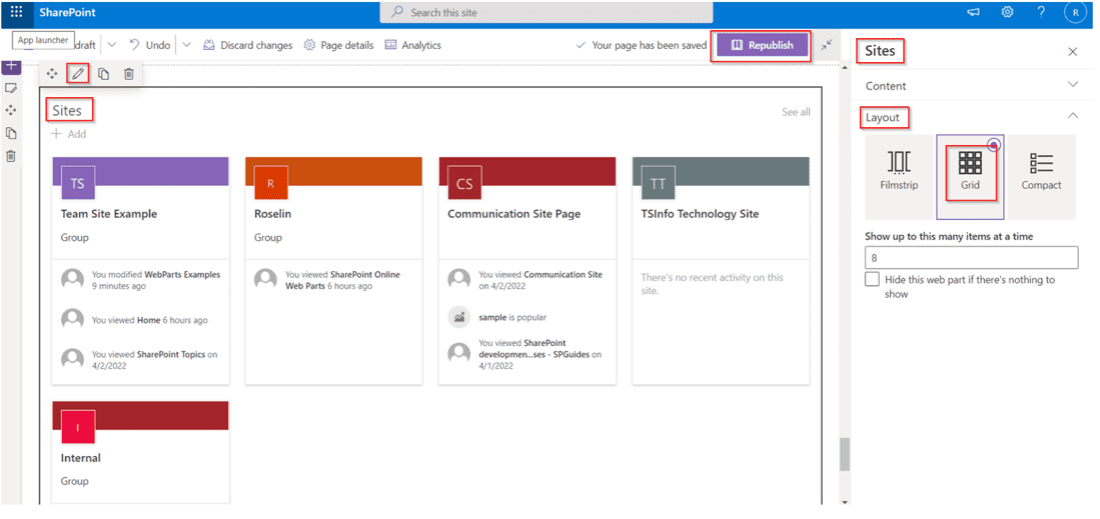
To rearrange your sites, click Edit web part. Select the Layout tab and click Cards. Then, you can drag and drop the sites to reorder them.
https://support.microsoft.com
The final result of your site map is below!
https://www.enjoysharepoint.com/sharepoint-online-sites-web-part/
Final Thoughts and Considerations
As we demonstrated above, both the Content Search Web Part and Sites web part can easily create a site map for your organization’s SharePoint Online. However, to ensure you select the correct option, there are a few things to consider.
Limitations
The Content Search Web Part has a built-in limit on the number of results it can show. If you have a large number of results, you may need to display your results on multiple pages, which can be a bit clunky and complicated. Also, this web part is only available for Classic SharePoint pages.
Classic vs. Modern SharePoint
The Sites Web Part is only available on modern pages. If a user is familiar with classic, on-premises SharePoint, you must take the time to train them properly on the differences between the legacy platform and SharePoint Online.
Knowledge
The Content Search Web Part requires a basic understanding of SharePoint content classes and categories that organize the content stored in SharePoint. Content classes ensure your results are properly filtered. If users don’t understand content classes, they may encounter challenges using this web part effectively.
Ultimately, by thoughtfully assessing how you want SharePoint to operate within your organization, you can maximize its features to create a site map that not only improves visibility but also enhances productivity for your employees.
With Microsoft Teams and Sharepoint, governance and adoption are key.

