
In this series, we will provide a how-to-guide on applying the Cucumber Framework to lead your agile testing team down the path of automation.
Blog one of a series.
Imagine this scenario: Your agile testing team is starting to adopt Behavior-Driven Development (BDD) principles by writing Acceptance Criteria and test scripts in the Gherkin (Given-When-Then) format.
So far, there have been some successes: defect counts have gone down, developers are delivering code faster, and product owners seem to be happier as they get more of what they want.
But your agile testing team is struggling to get all functional testing done in one sprint. And, regression testing is only being used as needed, which isn’t too often.
So for this next sprint, your team is going to try using a well-known BDD, Acceptance Test Driven Development, and Agile Testing trick: create and execute your scripts in the Cucumber automation framework.
Getting Started With Cucumber
After attending a BDD/ATDD/Cucumber/WebDriver training course and receiving clearance from corporate security to install the needed software, your agile testing team is ready.
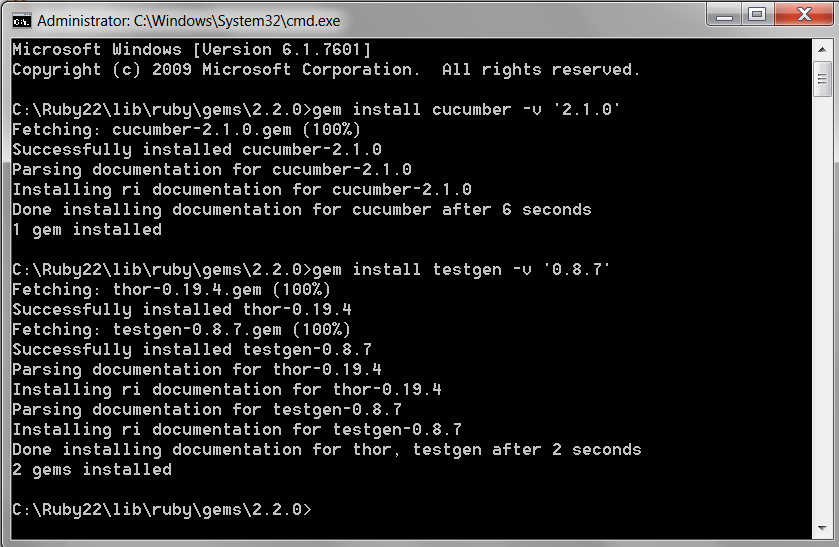
Your team starts by downloading and running Rails Installer, which installs Ruby and some key gems on your laptop, as well as JetBrain’s RubyMine IDE. The final two gems your team will need: Cucumber and TestGen. To install them, they type the following in Command Prompt:
gem Install cucumber
gem install testgen
Then, to create a project in Command Prompt, go to the RubyMineProjects directory, type the following, and let testgen create the project for you:
testgen project <project name> –pageobject-driver=watir
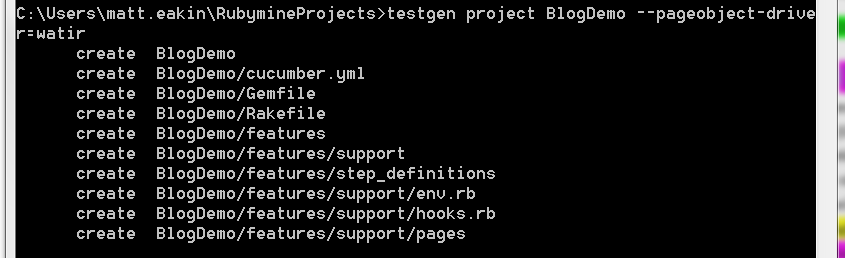
Open the Cucumber project in RubyMine and you are ready to go.
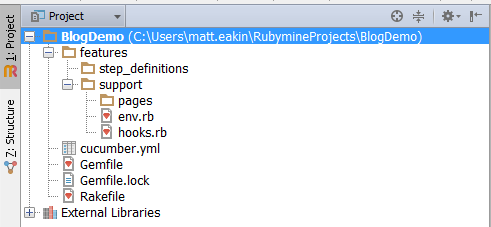
Understanding the Cucumber Structure
Here is what you will see:
- Gemfile – The file that contains a list of all the gems (and version numbers) used in this project. Once executed, it creates a Gemfile.lock file that details each gem used and their dependencies.
- Rakefile – Used when running the Cucumber framework. If a Cucumber Task is created in Rakefile, it will call a specific line in the cucumber.yml file. Otherwise, is will use the default entry.
- cucumber.yml file – A list of specific commands you wish to append to the execution command. Called from Cucumber Tasks in the Rakefile.
- features directory – Most of the code and files for your BDD project will be located here.
- step_definitions directory – This will contain all of your step definition files.
- env.rb – The first file cucumber executes. This makes it an ideal place to load gems and files.
- hooks.rb – Contains the Before and After hooks. The Before hook is executed BEFORE each Scenario; the After hook is executed AFTER each Scenario. This makes them ideal locations to open and close browsers, generate error messages, and load WebDrivers.
- pages directory – This is where all of your PageObjects are located.
Most Cucumber projects, regardless of the programming language, follow this structure. Understanding this structure and what each file and directory is used for is a big first step in leading your BDD and Agile Testing transformation on a path to automation.