
Read about Step Definitions in of our How-To-Guide on applying Cucumber to lead your agile testing team down the path to automation.
Blog five of a series.
You have decided to use Cucumber as your BDD automation tool, built a skeleton framework, and created your first Scenario.
But, while looking at your BDD Gherkin script, you are probably wondering: why is it highlighted in yellow?

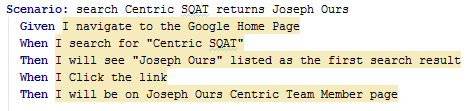
If you place the cursor over one of the highlighted lines, Cucumber will answer your question: Because Cucumber cannot find a corresponding step definition for the step. This is a good sign, however, because it is one more assurance that everything is wired up properly.
So our next step is to create the step definitions needed to execute this BDD Gherkin script. There are many ways to create the step definitions. In this blog, we will discuss two of them.
Creating Step Definitions
Since we do not yet have a step definitions file, we are going to let Cucumber create it for us in our step_definitions directory. Put the cursor on the Given line in the highlighted text. You should see a lightbulb appear to the left of the Scenario.
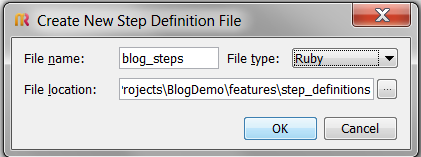
Click on it and select “Create Step Definition.” You should get a pop-up box. Change the file_name to whatever you would like, but keep the “_steps” at the end.
Hit OK and your step definition file will be created with the step definition! Hit ENTER a couple of times and you end up with the following:
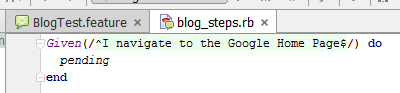
In a future blog, I will discuss what pending means. For now, just put a # in front of the word pending. This will turn the line into a comment line – and continue on to the next step.
Now that we have a step definition file to put our steps in, we can try the second step creation technique: let Cucumber create them.
You can accomplish this by running our .feature file. Right-click the .feature file and select the “Run BlogTest.feature” option.
At the bottom of RubyMine you will see the Run pane appear (if it hasn’t already). While most of your script either failed or was skipped, three were undefined with Cucumber giving us this output:
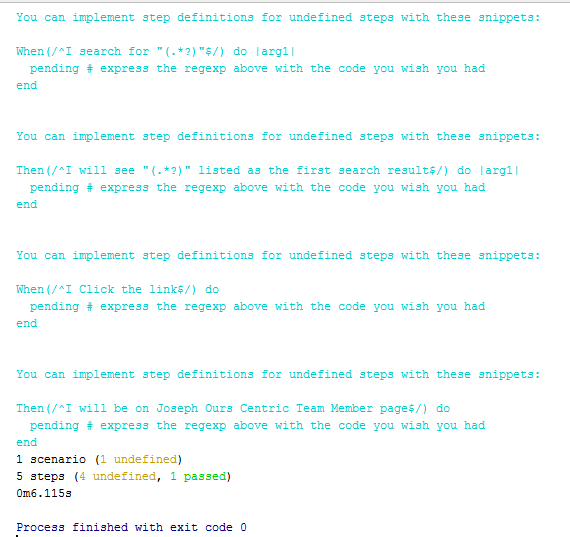
Copy and paste all four snippets into your step definition file (don’t forget to remove the “You can implement” lines).
RubyMine tip: hit Ctrl+Alt+L to align your text.
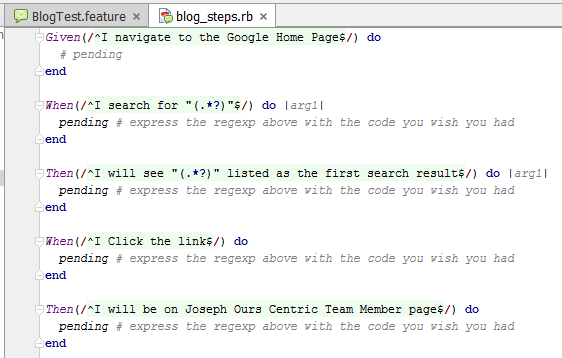
If everything was copy and pasted properly, your Gherkin script should no longer have highlighted text:
![]()
As we did before, put a # in front of each pending line to comment out each line. Run the .feature file again and you should get something similar to this:

Congratulations! Your framework does nothing, but it passes. And that is a HUGE first step because it means you now ready to add code and get to know WebDriver.
If you are a traditional manual agile testing team member, don’t worry about coding. Getting this far is quite an accomplishment. Adding WebDriver code to your Cucumber framework will seem easy by comparison.